

Could Inversion Tables Be The Best Stretch For Back Pain Relief?
Inversion tables are great for back pain relief when done right, especially if you have bulging discs or herniated discs in your lower back. However like all treatments or at home remedies, when done wrong it can be more of a problem than a relieving cure. Today we’ll be looking into spinal decompression stretches you can do at home and taking the Teeter inversion table as an example. We’ll cover some of the background information around at home spinal decompression or traction, as well as give our step-by-step instructions on how to use an inversion table. We’ll also offer some pro tips on how you can turn this at home back traction tool into a spinal decompression stretch too.
The best back stretch you can do at home
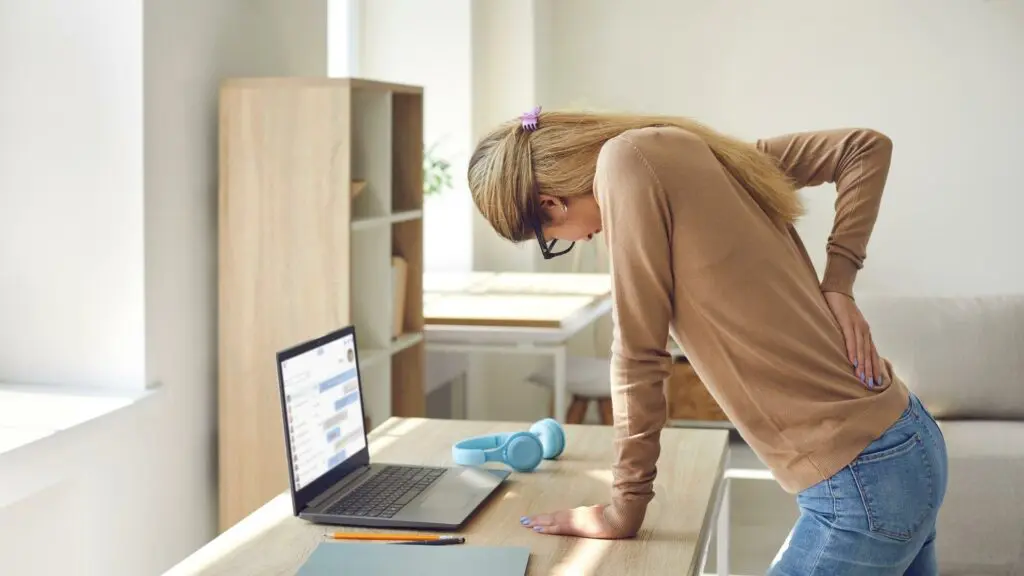
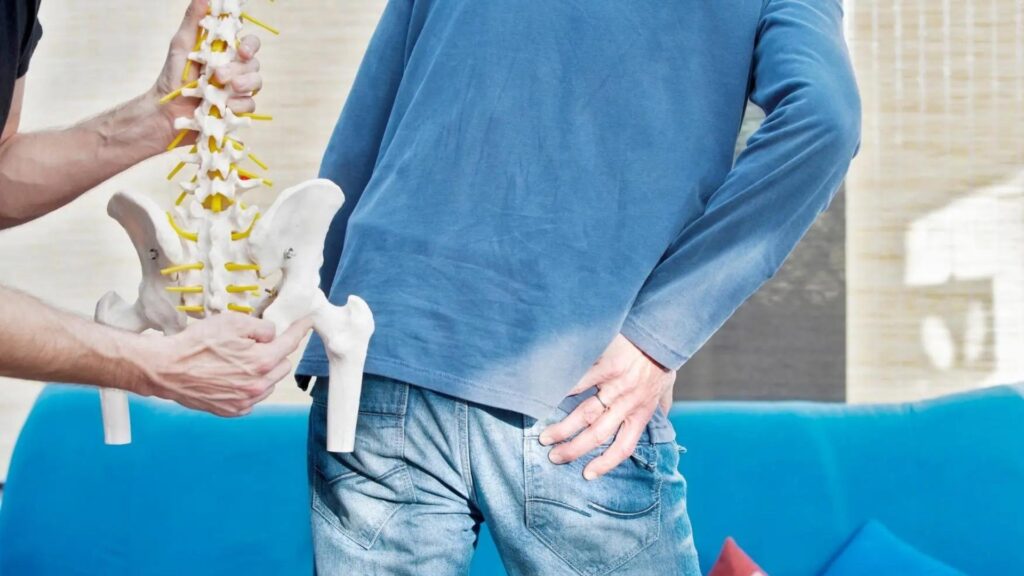
All of us spend too much time sitting and putting too much pressure on the lower part of our lower backs, this is one of the factors that leads to the frequent damage and degeneration noted at the L4, L5 and L5, S1 sections of the lumbar spine. These are the last two mobile parts of our back, the ones that have to bear most weight and the ones that nearly all people with low back pain have as the origin of their pain. Part of this vulnerability is the combination of constant strain on the region coupled with ever decreasing levels of physical conditioning, something we’ve discussed many times before on the Back In Shape podcast.
Inversion tables offer us a remedy to at least offer an antidote to the compression. For those without a specific diagnosed injury to the lower back, they can offer a great way to keep the back healthy. After all, you don’t wait to brush your teeth until you have cavities, so why would you wait to engage in healthy back practices until you have an overt back injury?
For those who do have a specific injury, let us say a disc herniation or degenerative disc disease, maybe with some sciatica symptoms, this method can result in almost immediate relief of symptoms as pressure is taken directly off the injured disc. We’ll have more instruction on how to use these inversion tables to get the most benefit later on.
The difference between decompression and traction
There is a difference between these two methods of unloading the lower back which is worth noting. We can see this difference most obviously in the clinical arena. In years gone by spinal traction was a method employed by hospitals, for weeks on end, whereby the person was constantly stretched, essentially with weights attached to their ankles.
This is not optimal at all.
Modern day non-invasive spinal decompression is very different. This seeks to create a short period of 10 to 30 minutes of pumping in the lower back by switching between a higher pull strength and lower pull strength in order to more effectively restore disc health and alleviate pressure in the soft tissues that surround the injured region of your back. Although inversion tables are “traction” tables by design, we’ll discuss some specific tips to turn yours into a spinal decompression table when we go through the demonstration later on.
How to use your at home spinal decompression table
It is important to note that there are many tables out there, but the industry leader in our opinion is the Teeter table.
Note: we have no affiliation with Teeter table at the time of writing this article and do not benefit from endorsing this product of theirs. We have bought 2 of these ourselves, given one away (to our members) and kept one for personal use…
A quick word on safety before you start using your inversion table
The issue with an inversion table is safety, and quite frankly some of the models were too unstable and poorly constructed. Like with anything, if the tool is well made, safe and easy to use, you will use it. If it is poorly constructed, you will not feel confident using it and it will be added to the list of things you’ve bought that sit in storage. When using these tables our opinion is that if you’re not going to get the Teeter table, or something of comparable quality, save up more money until you can afford one. Spending a comparably lesser amount could lead to trouble.
In spite of this you must use the device properly! This includes the most important parts, the ankle locks, which hold you in place, and the limiter strap which limits how far round you go into inversion. Make sure these are attached and working properly EVERY TIME you go to use your inversion table, otherwise you might end up with a nasty surprise.
Using your inversion table for the first time
If this is the first time you’re using an inversion table for your back pain or sciatica, make sure that you use it carefully, familiarise yourself with the inversion limiting strap, the ankle locking mechanism, and set conservative limits the first time so you can spend a little time practicing controlling the table at the horizontal position. There is a little practice required the very first time you use it. These cautious steps will help you ease yourself into the mechanics of the table without any accidents which might put you off using the inversion table.
Step 1: Setting the table right for safe use
Start by setting the appropriate height setting, which is important for effective user control. Make sure the safety belt is hooked in and set to the appropriate inversion level if you’re using it as a limiter.
Step 2: Getting on the inversion table
Position yourself on the table and place your feet in the foot holds and secure the ankle lock. It should be snug and “click” into place. Test forcing it open a few times to make sure it is in fact locked and you’re ready to go.
Step 3: Start slowly
Slowly move the table to the flat position for a moment, then begin to invert using your body to control the amount of movement until you’re “inverted” and the gentle stretch of your lower back begins to be felt.
Step 4: Decompress your spine
Now if you’ve set a limiter, you have a “maximum pull setting”. Spend 15 to 30 seconds down here, before coming up halfway. For example, if you’ve set 60 degrees as the Max setting, then come up to 0-30 degrees inversion for 15-30 seconds before returning to 60 degrees again.
Step 5: Return to upright
Once you’ve completed your treatment, return to flat for about 30 seconds to a minute, then steadily return to the upright setting. Do not just go from full inversion to full upright in one go. This will create trouble!
Step 6: Dismount sensibly
Finally bend your knees to reach the ankle locking mechanism. AVOID bending your lower back! Once the ankles are unlocked you can slowly step off the table.
Step 7: Post Decompression Routine
There are some simple tips you need to observe for additional benefit post decompression stretching, contrast bathing or some icing alone for a few minutes can be a helpful tool post decompression and something we have found some patients find particularly useful after treatments, especially at certain times. You can read more about contrast therapy for back pain in the dedicated podcast episode.
Safe spinal decompression at home: Pro tips
There are some things you should be mindful of when using these devices for maximum benefit if you have a lower back injury.
- Don’t go full inversion: This is just unnecessary and often creates more force than is optimal, increasing the likelihood of you being sore after your session on the inversion table.
- Use the safety strap: Especially useful for beginners, but even if you’re used to using your table, it is nice to know your parameters are fixed before you start your decompression.
- Don’t do the twists and situps: These are fundamentally unnecessary and are more a gimmick than helpful, and perhaps even problematic for those with an injured lower back.
- Keep it simple: This is a self-treatment tool, keep things simple and easy to do, especially when doing them at home. Complexity often only adds risk, not results.
- Durations of 5-10 minutes: Shorter durations are much better in our experience.
- More frequent instead of longer duration: more short duration sessions compared with one longer session works much better.
- Always return to upright slowly: Never neglect to return the load to your back gently, it makes the world of difference, reducing any nasty reactions to the stretch.
- Always dismount carefully: Similarly, you should always observe the good dismounting procedure and keep your spine neutral using your hips and knees instead.
Part of your rehab approach
After all this it is important to fully understand precisely what role your inversion table has in your back health and injury recovery, as you should with any treatment, program or practice. The use of inversion tables allows those of you with a lower back injury to regularly unload the region of the lower lumbar spine where the main issue resides, providing an antidote to the daily strain that accumulates. For those who do not have a “back injury” but have the foresight to recognise they only have one spine, this offers a great care-of-self activity, especially if you’re regularly training in the gym or working out. Yes, building the strain in your body is essential to building long term resilience, but tools like the inversion table can offer a great way to unwind post workout just like your lower body stretching routine and Phase 1 routine at large. This being said, not everyone has an inversion table at home! If you want to still benefit from some great home decompression stretches for your lower back then check out the recent video we released on 3 decompression stretches that you can do from home with no equipment.
Finally, don’t forget if you need any help, we’ve got 3 great ways you can get the help you need:
- The Podcast and Youtube channel as a great source of free information on all things back & spine health.
- The membership to Back In Shape which gives you access to the full program and everything you need to rehabilitate your lower back from home.
- Book in with us for a virtual or “in-person” consultation & treatment at the Back In Shape Studio.


Responses